
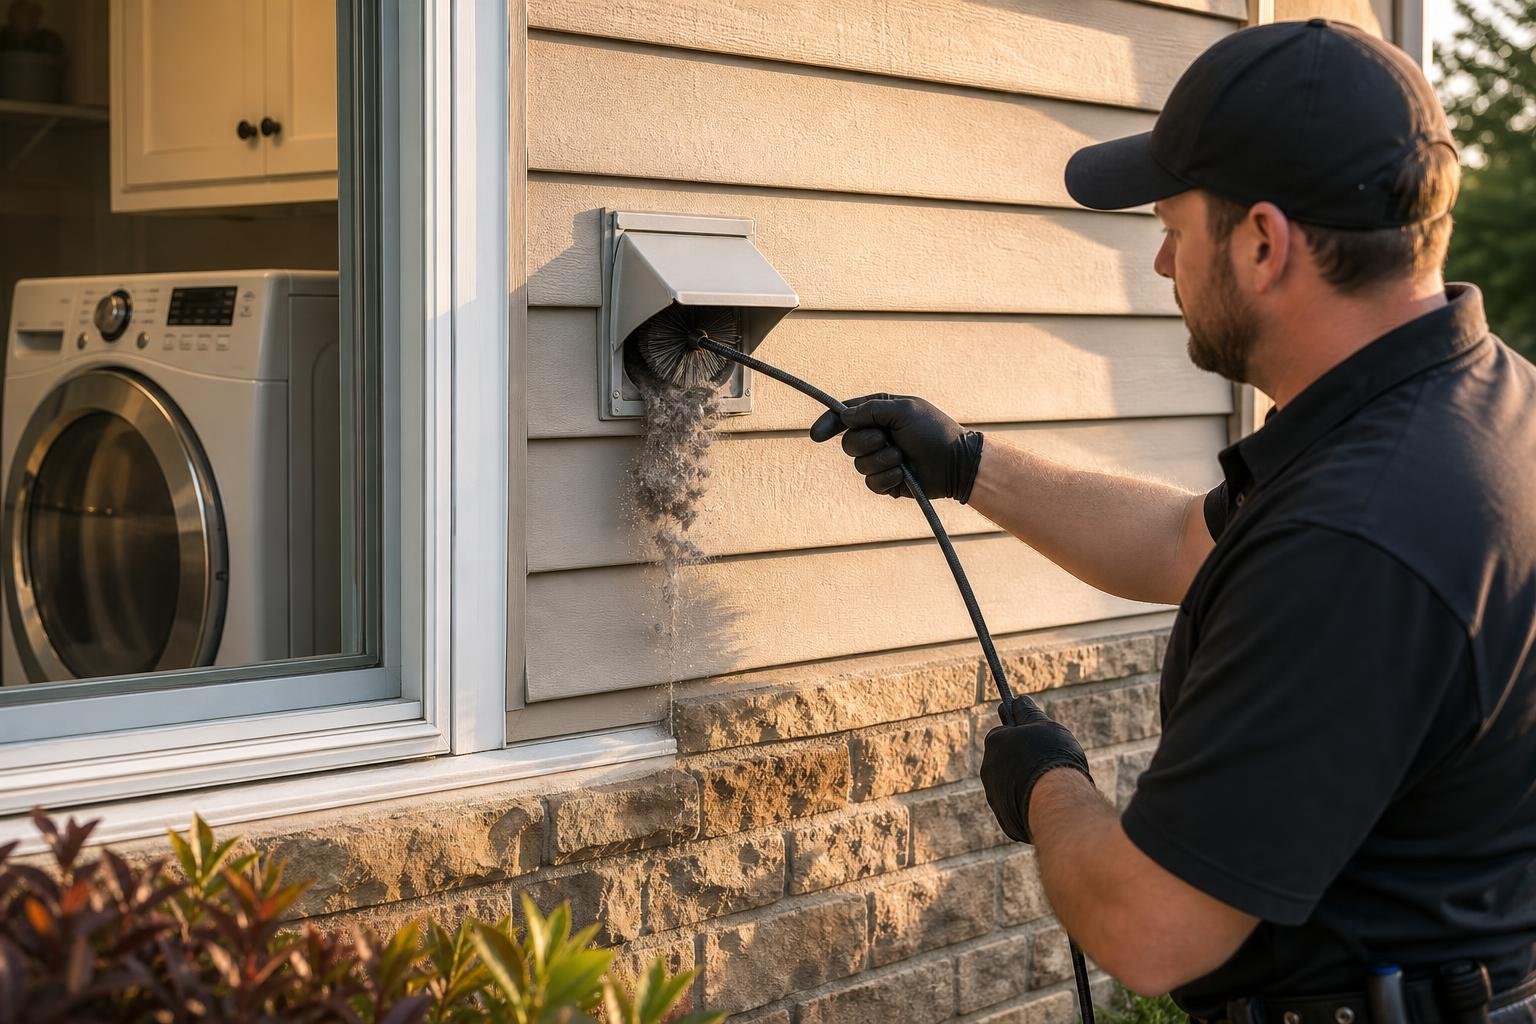
Quick AnswerCut the power or gas, pull the dryer out, disconnect the duct, and run a rotary lint brush on flexible rods through the full duct run while vacuuming what comes loose — then clear the outside hood and test the airflow. Do it at least once a year. The US Fire Administration attributes 34% of residential clothes dryer fires to failure to clean.
Why Does a Dryer Vent Need Cleaning at All?
Because the duct collects the lint the screen misses, and that lint is the fuel in a dryer fire. The US Fire Administration estimates 2,900 clothes dryer fires in residential buildings each year, causing 5 deaths, 100 injuries and $35 million in property loss, with failure to clean the leading contributing factor at 34%.
Those figures come from USFA analysis of 2008 to 2010 incident data, the most recent national breakdown published at that level of detail, so treat them as an order of magnitude rather than this year’s count. The pattern inside them is what matters: 82.6% of the fires with a known origin started in the laundry area, and incidence peaks in the cold months, with January alone accounting for 11%.
The mechanism is simple. A lint screen catches perhaps the coarse fraction of what comes off your clothes; the rest rides the airstream into the duct and settles wherever the air slows down — at elbows, at seams, at the outside hood. As the layer thickens, exhaust slows, moist heat backs up into the drum, and the dryer runs longer and hotter to finish the same load. Now you have an overheating appliance venting into a duct lined with dry fibre.
What Tools Do You Need to Clean a Dryer Vent?
A rotary lint brush on flexible rods, a shop vacuum with a crevice tool, a screwdriver or nut driver, foil-backed duct tape, a dust mask and a flashlight. A cordless drill is optional but makes the brush far more effective. A consumer brush kit runs roughly $15 to $50, which HomeGuide puts well under one professional visit.
- Rotary lint brush kit. A nylon-bristle head on screw-together flexible rods, usually sold in 12 to 24 foot sets. The brush is what actually scrubs the packed layer off the duct wall; everything else just removes what the brush frees.
- Shop vacuum with a crevice tool. A household vacuum will clog. You need something that can take a large volume of fine fibre without losing suction.
- Cordless drill. Spinning the brush cuts through compacted lint that pushing alone slides past. Run it forward only — reversing can unscrew the rods and leave a brush head stranded in the duct.
- Foil-backed duct tape and clamps. For resealing the transition duct. Never use cloth duct tape, which dries out and lets the joint open.
- Dust mask, flashlight and a screwdriver or nut driver. For the exterior hood screws and for seeing what is actually in the duct before you start.
What you do not need: a chemical cleaner, a pressure washer, or an air compressor. Lint is a mechanical problem, and the fix is mechanical.
How Do You Clean Out a Dryer Vent Step by Step?
Eight steps: kill the power or gas, pull the dryer out, disconnect the transition duct, vacuum both open ends, brush the full duct run, clear the exterior hood, reconnect and seal, then run an air-fluff cycle and confirm strong airflow outside. On a straight, accessible run the whole job takes 30 to 60 minutes.
1. Cut the power, and the gas if it is a gas dryer
Unplug an electric dryer at the wall. For a gas dryer, close the shutoff valve on the supply line but leave the flexible connector attached to the appliance. If moving the dryer means disturbing the gas connector at all, stop and book a technician — a disturbed gas fitting is a different class of hazard from a dirty duct.
2. Pull the dryer away from the wall
Give yourself two to three feet of working room. Walk it out rather than dragging it, especially on vinyl or tile. Look behind it before you start: a crushed duct pinned flat against the wall is a common find, and it needs replacing rather than cleaning.
3. Disconnect the transition duct
Loosen the clamp or peel back the foil tape and pull the flexible transition duct off the dryer outlet, then off the wall stub. Inspect it while it is off. Tears, crush points, white plastic duct or thin foil accordion duct all mean replacement, not cleaning.
4. Vacuum both open ends
Vacuum the dryer’s exhaust port, the lint trap housing and the first few feet of the wall duct with the crevice tool. This is where the heaviest deposit usually sits, because it is the first place the airstream slows after it leaves the drum.
5. Brush the full duct run
Feed the rotary brush into the wall duct, adding rods as you go, and spin it with the drill in forward. Work in and out over the same stretch a few times before advancing. Keep the shop vacuum running at the opening to catch the debris as it comes back toward you.
6. Clear the exterior hood
Go outside, open or unscrew the vent hood, and pull the packed lint out by hand. Check that the backdraft damper flaps swing freely and close when the dryer is off. If there is a screen or mesh behind the hood, it does not belong there; it is a lint trap on the wrong side of the duct.
7. Reconnect and seal
Refit the transition duct at both ends with clamps or foil-backed tape, keeping it as short and straight as it will go, with no kinks and no crush where the dryer sits back. Push the dryer back gently and leave a few inches of clearance so the duct is not folded flat.
8. Test the airflow
Restore power or gas, run the dryer on air-fluff for five minutes, and go outside and feel the discharge. You want a strong, steady stream with the damper fully open. Weak or intermittent flow after a clean means an obstruction further along, a crushed section, or a duct run longer than the appliance can push against.
How Do You Clean a Dryer Vent From the Outside?
Open or remove the exterior hood, pull out the packed lint by hand, then feed the rotary brush inward along the duct while a helper holds a vacuum at the dryer end. It works, and it is often the only practical approach when the dryer is boxed into a closet. It also has one consistent blind spot.
That blind spot is the first few feet behind the dryer. Lint packs hardest right where the airstream leaves the drum and hits the first bend, and a brush driven from the far end tends to push that plug further in rather than pull it out. If you clean from outside only, at minimum disconnect the transition duct as well and vacuum the appliance end by hand.
Outside-only cleaning is also how a blocked termination gets missed. Birds nest in dryer hoods precisely because they are warm, sheltered and often screened over by a previous owner. If the brush stops short of where you expect the duct to end, you have found an obstruction, not the end of the duct — do not force it.
How Do You Clean a Clogged Dryer Vent?
Same tools, more patience, and from both ends. Brush in from the dryer side and from the exterior hood, meeting in the middle, and vacuum after every few passes rather than at the end. If the brush will not pass a point from either direction, the duct is crushed, disconnected inside the wall, or blocked by a nest — stop and open it up.
A genuinely clogged vent announces itself before you open anything: loads that need two cycles, a dryer cabinet too hot to rest a hand on, a damp or burnt-lint smell in the laundry room, and a damper outside that barely lifts. A clogged vent is the state the USFA fire statistics describe, so it is worth treating as urgent rather than as a weekend job you will get to.
One thing not to do: run the dryer to blow the clog through. That is the exact operating condition — restricted exhaust, elevated drum temperature, a duct full of dry fibre — that turns a maintenance problem into an ignition event. If the vent is blocked, stop using the dryer until it is clear.
Can You Clean a Dryer Vent With a Leaf Blower or a Drill?
A drill-driven rotary brush is the right tool; a leaf blower is not. The brush scrubs compacted lint off the duct wall, which is the layer that actually restricts airflow. A leaf blower moves loose fibre only, and it can drive that fibre into elbows and pack it tighter than it was before.
| Method | What it removes | Where it falls short |
|---|---|---|
| Rotary brush on rods, drill-driven | The packed layer bonded to the duct wall, plus loose lint | Rods can unscrew if the drill is reversed; limited by kit length |
| Rotary brush pushed by hand | Most loose lint, some of the packed layer | Slides past hard deposits at elbows |
| Shop vacuum alone | Loose lint within reach of the hose | Reaches only a few feet; leaves the bonded layer intact |
| Leaf blower at the dryer end | Loose fibre in a straight, short run | No scrubbing action; can compact lint at bends and blow it into the room |
| Professional rotary system with vacuum | Full run including elbows, plus airflow verification | Costs money; scheduling in peak season |
If you only own one of these, own the brush kit. The distinction that matters is scrubbing versus moving air: everything that fails in this table fails because it moves air past a deposit instead of taking the deposit off the wall.
How Do You Clean a Long or Roof-Mounted Dryer Vent?
Long runs need a rod kit that reaches the full length plus a margin, and cleaning from both ends. Roof-terminated vents need working at height on a pitched surface, and that is where a DIY clean stops being a good trade. Roof vents are also the most expensive category professionally, at roughly $150 to $250 per Angi.
Length is not just a reach problem. The 2021 International Residential Code caps a dryer exhaust duct at 35 feet of developed length, and every elbow counts against that budget: a 4-inch 90-degree elbow deducts 5 feet and a 45-degree elbow deducts 2 feet 6 inches. A run with four 90s has already spent 20 of its 35 feet. If your duct is near or over that limit, cleaning it more often is managing a symptom; rerouting or adding a booster fan addresses the cause.
For a roof termination, the practical rule is that if you would not otherwise go on that roof, do not go on it for lint. The same logic we apply to chimney sweeping frequency applies here: the access risk, not the dirt, is what decides whether a job is a homeowner job.
How Often Should You Clean a Dryer Vent?
At least once a year for a typical household. Move to every six months if you run laundry daily, if the duct is long or has several elbows, or if you regularly dry pet bedding, towels and other heavy-lint loads. The lint screen is a separate job entirely: clear it after every load, every time.
Annual is the consensus figure across trade and consumer sources, including This Old House, which recommends yearly cleaning with semi-annual service for heavy users. It is also the same cadence NFPA 211 sets for chimneys and vents generally, which is a useful way to remember it: the dryer duct gets looked at when the chimney does.
Frequency should follow the duct, not the calendar. A 6-foot straight run through a basement rim joist genuinely can go a year or more. A 30-foot run with three elbows ending on a second-floor wall will not, because every bend is a place where lint settles out of the airstream. If you found a heavy deposit last time, shorten the interval rather than repeating it.
What Are the Signs a Dryer Vent Needs Cleaning?
Loads that need a second cycle, a dryer cabinet or laundry room that gets unusually hot, a burnt or musty smell, lint appearing around the door seal, and an exterior damper that barely opens when the dryer runs. Any one of these means check the vent. Two or more means stop using the dryer until you have.
- Clothes are still damp after a full cycle. The single most reliable early sign. Restricted exhaust means moisture has nowhere to go, so the load never finishes.
- The dryer or the room gets hot. Heat that should be leaving through the duct is staying in the cabinet and the space around it.
- A burnt or musty smell during a cycle. Burnt means lint is being scorched somewhere it should not be. Musty means humid exhaust is condensing inside the duct.
- The outside damper barely moves. With the dryer running you should feel a strong, warm stream and see the flaps held open.
- Lint around the door seal, or a sensor error. Lint escaping at the front and moisture-sensor faults both point back to the same restricted airflow.
- Black or scorched marks inside the duct. This is not a cleaning issue. It is evidence that lint has already ignited once, and it needs a technician to look at the appliance as well as the duct.
How Long Does It Take to Clean a Dryer Vent?
About 30 to 60 minutes for a straight, accessible duct under 15 feet, which matches the professional service time HomeGuide reports. Long runs, multiple elbows, second-floor routing or a roof termination push the job toward two hours. Add time on a first attempt for moving the dryer and resealing the duct properly.
Most of the time goes into access rather than brushing. Pulling a dryer out of a tight closet, getting the clamp off a transition duct that was taped over three times, and reaching an exterior hood behind a shrub each cost more minutes than the actual pass with the brush. Budget the afternoon the first time and you will know the real number for your house afterwards.
How Much Does Professional Dryer Vent Cleaning Cost?
Angi puts the 2026 national average at about $145, with most jobs between $75 and $340 depending on where the vent terminates. HomeGuide reports an average near $130 and a typical range of $80 to $185. These are typical US ranges, not a quote. For the figures broken out by add-on, repair and national brand, see our dryer vent cleaning cost guide.
| Job | Typical US range |
|---|---|
| National average, standard clean | About $130 to $145 |
| Basement or first-floor vent | $80 to $150 |
| Second-floor vent | $110 to $185 |
| Roof-terminated vent | $150 to $250 |
| Vent inspection only | $30 to $60 |
| Bird nest removal | $120 to $250 |
| Vent guard installation | $30 to $100 |
| DIY brush kit | $15 to $50 |
Termination point drives most of the spread, because it decides how the technician has to reach the duct. Length, elbow count and how long it has been since the last clean account for the rest. If you are comparing quotes, ask whether the price includes the appliance end and an airflow check afterwards, or only a pass through the wall duct.
What Does the Building Code Require for a Dryer Vent?
The 2021 International Residential Code, Section M1502, requires smooth-interior rigid metal duct, 4 inches nominal, not less than 0.0157 inch thick, with a maximum 35 feet of developed length, terminating outdoors at least 3 feet from any building opening, fitted with a backdraft damper and no screen.
| Requirement | Code value | Why it matters for lint |
|---|---|---|
| Duct material | Metal, smooth interior, not less than 0.0157 in (28 gage) | Ridged foil and plastic duct catch lint in every corrugation |
| Duct diameter | 4 in nominal | Undersized duct raises velocity loss and deposits lint sooner |
| Transition duct length | Not greater than 8 ft | The flexible section is the likeliest place to crush or kink |
| Maximum developed length | 35 ft from the transition duct connection | Beyond this the dryer cannot clear its own lint |
| Elbow deduction | 5 ft per 4-in 90-degree elbow; 2 ft 6 in per 45-degree elbow | Each bend is where lint settles out of the airstream |
| Termination | Not less than 3 ft in any direction from building openings | Keeps humid, lint-laden exhaust out of windows and intakes |
| Damper and screens | Backdraft damper required; screens not permitted at the termination | A screen is a lint trap on the outdoor end of the duct |
One more detail worth knowing before you reassemble anything: the code prohibits joining duct with screws or fasteners that protrude more than 1/8 inch into the duct, because every protrusion is a snag point that starts a deposit. That is why joints are clamped or taped with foil-backed tape rather than screwed. InterNACHI also notes that flexible transition ducts should meet UL 2158A.
When Should You Stop and Call a Pro?
Four situations: a roof-terminated vent, a run you cannot reach the end of, any sign that lint has already scorched, and a gas dryer whose connection would have to be disturbed to get behind it. In each case the risk sits in the access or the appliance, not in the lint, and a brush kit does not address it.
Add a fifth if your duct exceeds the code length, or has so many elbows that its developed length does. That is a design problem: no cleaning interval fixes a duct the dryer cannot clear on its own, and the answer is rerouting, shortening, or a booster fan sized to the run. A technician can measure the developed length and tell you which of those applies.
It is also worth calling someone if you have never had the vent cleaned and do not know where it runs. Ducts disappear into joist bays, get buried in finished ceilings, and occasionally terminate into an attic or crawlspace rather than outdoors — which is a moisture and mould problem on top of a fire one. The Chimney Safety Institute of America describes its Certified Dryer Exhaust Technician credential as the only nationally recognised certification for this work, so it is a reasonable thing to ask a company about.
Dryer Vent Cleaning From Your Local Team
If you live in or around Nashville, Cincinnati, Cleveland or Minneapolis, our crews clean the full duct run from the appliance to the termination, check the airflow afterwards, and flag any duct that is crushed, oversized in length or venting somewhere it should not. Choose your city below for local details and booking.
Nashville, TN · Cincinnati, OH · Cleveland, OH · Minneapolis, MN
FAQs
Cut the power or gas, pull the dryer out, disconnect the transition duct, then run a rotary lint brush on flexible rods through the duct from both ends while vacuuming what comes loose. Clear the outside hood by hand, reconnect everything and run the dryer on air-fluff to confirm strong airflow.
At least once a year for a typical household. Clean it every six months if you run laundry daily, have a long or multi-elbow duct run, or dry pet bedding and heavy towels often. The lint screen is different: that gets cleared after every single load, not once a year.
Open or remove the exterior hood, pull out the packed lint by hand, then feed a rotary brush on rods inward along the duct while a helper holds a vacuum at the dryer end. Cleaning only from outside usually misses the first few feet behind the dryer, which is where lint packs hardest.
Angi puts the 2026 national average at about $145, with most jobs between $75 and $340. HomeGuide reports an average near $130 and a typical range of $80 to $185. Roof-terminated vents run higher, roughly $150 to $250. These are typical US ranges, not a quote.
It moves loose lint but it does not scrub the duct wall, and the packed, greasy layer that actually restricts airflow stays put. A leaf blower can also drive lint into elbows and pack it tighter. Use a rotary brush to break the buildup loose first, then vacuum it out.
A straight, accessible duct under 15 feet takes about 30 to 60 minutes. Long runs, multiple elbows, second-floor routing or a roof termination push a job toward two hours. If you are doing it yourself for the first time, allow extra time to move the dryer and reseal the transition duct properly.
Yes. The US Fire Administration estimates 2,900 clothes dryer fires in residential buildings each year, causing 5 deaths, 100 injuries and $35 million in property loss. Failure to clean was the leading contributing factor, at 34 percent of those fires. Lint is the fuel and the dryer supplies the heat.
Rigid metal duct, 4 inches nominal, with a smooth interior. The 2021 IRC sets the wall thickness at not less than 0.0157 inch and limits the flexible transition duct at the dryer to 8 feet. White plastic and thin foil accordion duct trap lint in every ridge and should be replaced.
Sources and Standards Cited
Cost figures are published national ranges from the sources below, not our quotes. Standards and statistics are linked to their publishers.
- US Fire Administration (FEMA), Clothes Dryer Fires in Residential Buildings — 2,900 fires, 5 deaths, 100 injuries, $35 million loss, 34% failure to clean, January peak, 2008–2010 data.
- 2021 International Residential Code, Chapter 15, Section M1502 Clothes Dryer Exhaust — duct material, diameter, 8 ft transition duct, 35 ft developed length, elbow deductions, termination and damper.
- NFPA 211, Standard for Chimneys, Fireplaces, Vents, and Solid Fuel–Burning Appliances — annual inspection cadence for chimneys and vents.
- NFPA, Clothes Dryer Safety Tip Sheet — lint screen and venting guidance.
- Chimney Safety Institute of America, Certified Dryer Exhaust Technician (C-DET) — nationally recognised dryer vent credential.
- InterNACHI, Dryer Vent Safety — duct construction, UL 2158A transition ducts, termination rules.
- Angi, How Much Does Dryer Vent Cleaning Cost, updated July 2026.
- HomeGuide, Dryer Vent Cleaning Cost, 2026.
- This Old House, How To Clean a Dryer Vent — procedure and frequency guidance.